最後更新日:2020/06/02
[Flutter]Flutter Firebase Cloud Messaging
最近開始用Flutter來撰寫手機跨平台App,大部分的問題都很好解決,唯獨使用Firebase Cloud Messaging來發送推播通知,參考了網路上各國語言的教學,但總是會有一些奇怪的bug存在,幾乎沒有看到一篇沒有錯誤且功能非常完整的教學文章,幸好憑藉著多年程式的功力,一個一個的把問題解決了,以下純粹是記錄免得自己忘記一些細節。
(這一篇是唯一我覺得完整度還不錯的文章,但仍然不夠完整https://www.djamware.com/post/5e4b26e26cdeb308204b427f/flutter-tutorial-firebase-cloud-messaging-fcm-push-notification)
使用Firebase來發送推播,要執行的步驟非常的多,就算按照Cloud Messaging套件(https://pub.dev/packages/firebase_messaging)一步一步完成,最後仍然會不知道接下來怎麼辦?例如全都設定好之後,然後呢?要去哪發送訊息?發送完了,奇怪,怎麼都沒收到訊息…諸如此類的問題一大堆,對於初學者而言,單看套件的說明是非常不足的
好,不廢話,開始吧
- 首先,新增一個Flutter專案吧
- 連結至Firebase管理後台(https://console.firebase.google.com/)
- 新增專案及應用程式
- 按照Firebase指示下載good-service.json到android/app資料夾下
- 按照Firebase指示在android/build.gradle新增語法
dependencies {
 classpath ‘com.google.gms:google-services:4.3.3’
}
6.按照Firebase指示在android/app/build.gradle新增語法
dependencies {
    // add the Firebase SDK for Google Analytics
    implementation 'com.google.firebase:firebase-analytics:17.2.2'
    implementation 'com.google.firebase:firebase-messaging:20.1.0'

}

apply plugin: 'com.google.gms.google-services'
7.打開android/app/src/main/AndroidManifest.xml,新增下面粗體,主要是給背景推播用的
<application
        ...>
        <activity
            android:name=".MainActivity"
            ...>
            ...
            <intent-filter>
                <action android:name="FLUTTER_NOTIFICATION_CLICK" />
                <category android:name="android.intent.category.DEFAULT" />
            </intent-filter>
        </activity>
        ...
    </application>
8.新增一個java檔案,路徑為android/app/src/main/java/{專案applicationId ex:com.example}/Application.java,內容為:
package com.firebasecloudmessage.myflutter;  //記得要修改這行

import io.flutter.app.FlutterApplication;
import io.flutter.plugin.common.PluginRegistry;
import io.flutter.plugin.common.PluginRegistry.PluginRegistrantCallback;
import io.flutter.plugins.firebasemessaging.FlutterFirebaseMessagingService;

public class Application extends FlutterApplication implements PluginRegistrantCallback {

    @Override
    public void onCreate() {
        super.onCreate();
        FlutterFirebaseMessagingService.setPluginRegistrant(this);
    }

    @Override
    public void registerWith(PluginRegistry registry) {
        FirebaseCloudMessagingPluginRegistrant.registerWith(registry);
    }
}
記住上面第一行粗體一定要換成自己的applicationId,例如
package com.example
9.在同一層資料夾下新增FirebaseCloudMessagingPluginRegistrant.java,內容為:
package com.firebasecloudmessage.myflutter;  //記得要修改這行

import io.flutter.plugin.common.PluginRegistry;
import io.flutter.plugins.firebasemessaging.FirebaseMessagingPlugin;

public final class FirebaseCloudMessagingPluginRegistrant{
    public static void registerWith(PluginRegistry registry) {
        if (alreadyRegisteredWith(registry)) {
            return;
        }
        FirebaseMessagingPlugin.registerWith(registry.registrarFor("io.flutter.plugins.firebasemessaging.FirebaseMessagingPlugin"));
    }

    private static boolean alreadyRegisteredWith(PluginRegistry registry) {
        final String key = FirebaseCloudMessagingPluginRegistrant.class.getCanonicalName();
        if (registry.hasPlugin(key)) {
            return true;
        }
        registry.registrarFor(key);
        return false;
    }
}
同樣的,記得上面第一行粗體一定要換成自己的applicationId,例如
package com.example
10. 打開同樣資料夾下的MainActivity.java,內容為:
package com.firebasecloudmessage.myflutter;  //記得要修改這行

//import androidx.annotation.NonNull;
import io.flutter.embedding.android.FlutterActivity;
//import io.flutter.embedding.engine.FlutterEngine;
//import io.flutter.plugins.GeneratedPluginRegistrant;

public class MainActivity extends FlutterActivity {
//  @Override
//  public void configureFlutterEngine(@NonNull FlutterEngine flutterEngine) {
//    GeneratedPluginRegistrant.registerWith(flutterEngine);
//  }
}
同樣的,記得上面第一行粗體一定要換成自己的applicationId,例如
package com.example
11.修改AndroidManifest.xml的<application> name為.Application,路徑為android/app/src/main/
<application
        android:name=".Application"
        ...
    </application>
12.開始寫程式吧
在pubspec.yaml引入firebase套件
dependencies:
  flutter:
    sdk: flutter
  cupertino_icons: ^0.1.3
  firebase_analytics: any
  firebase_messaging: ^6.0.16
在lib/main.dart引用套件
import 'package:firebase_messaging/firebase_messaging.dart';
在import下直接新增下列方法
Future<dynamic> myBackgroundMessageHandler(Map<String, dynamic> message) {
  if (message.containsKey('data')) {
    // Handle data message
    final dynamic data = message['data'];
  }

  if (message.containsKey('notification')) {
    // Handle notification message
    final dynamic notification = message['notification'];
  }

  // Or do other work.
}
繼續新增,記得下面的範例中會用到matchteam , score , id三個參數,這是等下傳送推播時需要設定的參數,可自行依照需要修改
final FirebaseMessaging _firebaseMessaging = FirebaseMessaging();
final Map<String, Item> _items = <String, Item>{};
Item _itemForMessage(Map<String, dynamic> message) {
  final dynamic data = message['data'] ?? message;
  final String itemId = data['id'];
  final Item item = _items.putIfAbsent(itemId, () => Item(itemId: itemId))
    .._matchteam = data['matchteam']
    .._score = data['score'];
  return item;
}
繼續新增
class Item {
  Item({this.itemId});
  final String itemId;

  StreamController<Item> _controller = StreamController<Item>.broadcast();
  Stream<Item> get onChanged => _controller.stream;

  String _matchteam;
  String get matchteam => _matchteam;
  set matchteam(String value) {
    _matchteam = value;
    _controller.add(this);
  }

  String _score;
  String get score => _score;
  set score(String value) {
    _score = value;
    _controller.add(this);
  }

  static final Map<String, Route<void>> routes = <String, Route<void>>{};
  Route<void> get route {
    final String routeName = '/detail/$itemId';
    return routes.putIfAbsent(
      routeName,
          () => MaterialPageRoute<void>(
        settings: RouteSettings(name: routeName),
        builder: (BuildContext context) => DetailPage(itemId),
      ),
    );
  }
}
繼續新增一個Widget,當收到推播訊息時顯示用
class DetailPage extends StatefulWidget {
  DetailPage(this.itemId);
  final String itemId;
  @override
  _DetailPageState createState() => _DetailPageState();
}

class _DetailPageState extends State<DetailPage> {
  Item _item;
  StreamSubscription<Item> _subscription;

  @override
  void initState() {
    super.initState();
    _item = _items[widget.itemId];
    _subscription = _item.onChanged.listen((Item item) {
      if (!mounted) {
        _subscription.cancel();
      } else {
        setState(() {
          _item = item;
        });
      }
    });
  }
  @override
  Widget build(BuildContext context) {
    // This method is rerun every time setState is called, for instance as done
    // by the _incrementCounter method above.
    //
    // The Flutter framework has been optimized to make rerunning build methods
    // fast, so that you can just rebuild anything that needs updating rather
    // than having to individually change instances of widgets.
    return Scaffold(
      appBar: AppBar(
        // Here we take the value from the MyHomePage object that was created by
        // the App.build method, and use it to set our appbar title.
        title: Text("Match ID ${_item.itemId}"),
      ),
      body: SingleChildScrollView(
        child: Container(
          padding: EdgeInsets.all(20.0),
          child: Card(
            child: Container(
                padding: EdgeInsets.all(10.0),
                child: Column(
                  children: <Widget>[
                    Container(
                      margin: EdgeInsets.fromLTRB(0, 0, 0, 10),
                      child: Column(
                        children: <Widget>[
                          Text('Today match:', style: TextStyle(color: Colors.black.withOpacity(0.8))),
                          Text( _item.matchteam, style: Theme.of(context).textTheme.title)
                        ],
                      ),
                    ),
                    Container(
                      margin: EdgeInsets.fromLTRB(0, 0, 0, 10),
                      child: Column(
                        children: <Widget>[
                          Text('Score:', style: TextStyle(color: Colors.black.withOpacity(0.8))),
                          Text( _item.score, style: Theme.of(context).textTheme.title)
                        ],
                      ),
                    ),
                  ],
                )
            ),
          ),
        ),
      ), // This trailing comma makes auto-formatting nicer for build methods.
    );
  }
}
修改原本的MyApp Class為
class MyApp extends StatelessWidget {
  // This widget is the root of your application.
  @override
  Widget build(BuildContext context) {
    return MaterialApp(
      title: 'Flutter Demo',
      theme: ThemeData(
        // This is the theme of your application.
        //
        // Try running your application with "flutter run". You'll see the
        // application has a blue toolbar. Then, without quitting the app, try
        // changing the primarySwatch below to Colors.green and then invoke
        // "hot reload" (press "r" in the console where you ran "flutter run",
        // or simply save your changes to "hot reload" in a Flutter IDE).
        // Notice that the counter didn't reset back to zero; the application
        // is not restarted.
        primarySwatch: Colors.blue,
      ),
      home: MyHomePage(title: 'Flutter Demo Home Page'),
    );
  }
}

class MyHomePage extends StatefulWidget {
  MyHomePage({Key key, this.title}) : super(key: key);

  // This widget is the home page of your application. It is stateful, meaning
  // that it has a State object (defined below) that contains fields that affect
  // how it looks.

  // This class is the configuration for the state. It holds the values (in this
  // case the title) provided by the parent (in this case the App widget) and
  // used by the build method of the State. Fields in a Widget subclass are
  // always marked "final".

  final String title;

  @override
  _MyHomePageState createState() => _MyHomePageState();
}

class _MyHomePageState extends State<MyHomePage> {
  bool _topicButtonsDisabled = false;

  final FirebaseMessaging _firebaseMessaging = FirebaseMessaging();
  final TextEditingController _topicController =
  TextEditingController(text: 'topic');

  Widget _buildDialog(BuildContext context, Item item) {
    return AlertDialog(
      content: Text("${item.matchteam} with score: ${item.score}"),
      actions: <Widget>[
        FlatButton(
          child: const Text('CLOSE'),
          onPressed: () {
            Navigator.pop(context, false);
          },
        ),
        FlatButton(
          child: const Text('SHOW'),
          onPressed: () {
            Navigator.pop(context, true);
          },
        ),
      ],
    );
  }

  void _showItemDialog(Map<String, dynamic> message) {
    showDialog<bool>(
      context: context,
      builder: (_) => _buildDialog(context, _itemForMessage(message)),
    ).then((bool shouldNavigate) {
      if (shouldNavigate == true) {
        _navigateToItemDetail(message);
      }
    });
  }

  void _navigateToItemDetail(Map<String, dynamic> message) {
    final Item item = _itemForMessage(message);
    // Clear away dialogs
    Navigator.popUntil(context, (Route<dynamic> route) => route is PageRoute);
    if (!item.route.isCurrent) {
      Navigator.push(context, item.route);
    }
  }

  @override
  void initState() {
    super.initState();
    _firebaseMessaging.configure(
      onMessage: (Map<String, dynamic> message) async {
        print("onMessage: $message");
        _showItemDialog(message);
      },
      onBackgroundMessage: myBackgroundMessageHandler,
      onLaunch: (Map<String, dynamic> message) async {
        print("onLaunch: $message");
        _navigateToItemDetail(message);
      },
      onResume: (Map<String, dynamic> message) async {
        print("onResume: $message");
        _navigateToItemDetail(message);
      },
    );
    _firebaseMessaging.requestNotificationPermissions(
        const IosNotificationSettings(
            sound: true, badge: true, alert: true, provisional: true));
    _firebaseMessaging.onIosSettingsRegistered
        .listen((IosNotificationSettings settings) {
      print("Settings registered: $settings");
    });
    _firebaseMessaging.getToken().then((String token) {
      assert(token != null);
      print("Push Messaging token: $token");
    });
    _firebaseMessaging.subscribeToTopic("matchscore");
  }

  @override
  Widget build(BuildContext context) {
    // This method is rerun every time setState is called, for instance as done
    // by the _incrementCounter method above.
    //
    // The Flutter framework has been optimized to make rerunning build methods
    // fast, so that you can just rebuild anything that needs updating rather
    // than having to individually change instances of widgets.
    return Scaffold(
      appBar: AppBar(
        // Here we take the value from the MyHomePage object that was created by
        // the App.build method, and use it to set our appbar title.
        title: const Text('My Flutter FCM'),
      ),
      body: SingleChildScrollView(
        child: Container(
          padding: EdgeInsets.all(20.0),
          child: Card(
            child: Container(
              padding: EdgeInsets.all(10.0),
              child: Column(
                children: <Widget>[
                  Container(
                    margin: EdgeInsets.fromLTRB(0, 0, 0, 10),
                    child: Column(
                      children: <Widget>[
                        Text('Welcome to this Flutter App:', style: TextStyle(color: Colors.black.withOpacity(0.8))),
                        Text('You already subscribe to the matchscore topic', style: Theme.of(context).textTheme.title)
                      ],
                    ),
                  ),
                  Container(
                    margin: EdgeInsets.fromLTRB(0, 0, 0, 10),
                    child: Column(
                      children: <Widget>[
                        Text('Now you will receive the push notification from the matchscore topics', style: TextStyle(color: Colors.black.withOpacity(0.8)))
                      ],
                    ),
                  ),
                ],
              )
            ),
          ),
        ),
      ), // This trailing comma makes auto-formatting nicer for build methods.
    );
  }
}
最後最後,程式部分搞定
void main() {
  runApp(
    MaterialApp(
      home: MyHomePage(),
    ),
  );
}
13.至Firebase後台發送第一則訊息吧
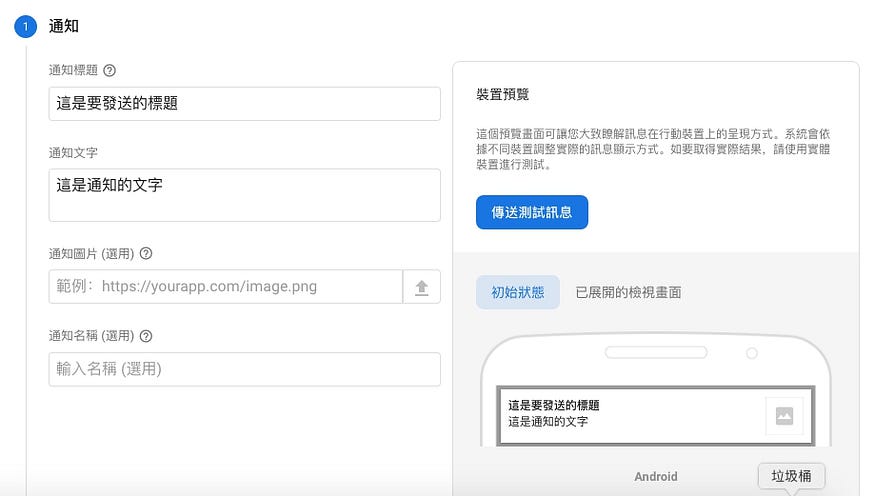
輸入標題跟內文,右方會有即時的示意畫面
選擇與專案相同id的應用程式
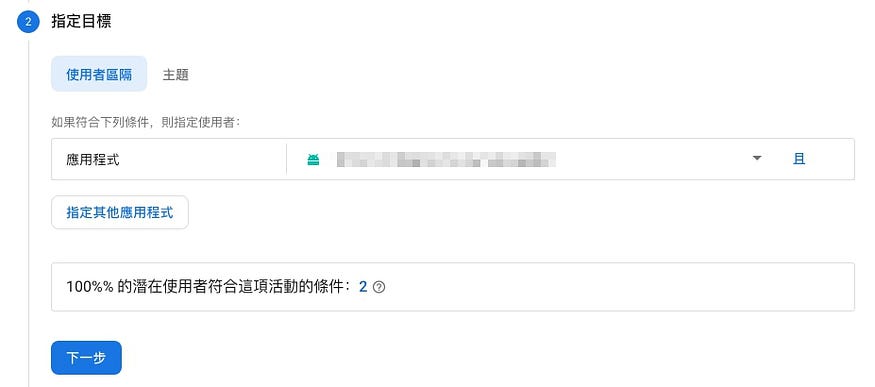
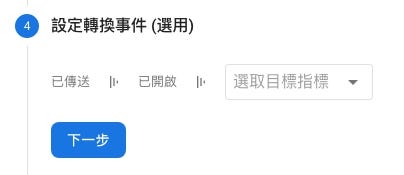
若沒有要排程,直接按下一步
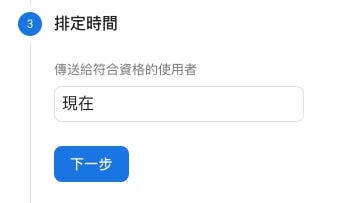
下一步
以下非常的重要,輸入剛剛在AndroidManifest.xml設定的資料,以及自訂的資料,若沒有輸入id以下的資料,訊息仍然可以傳送,但檢視內容的時候會出現null文字,完成後按下面的審查按鈕
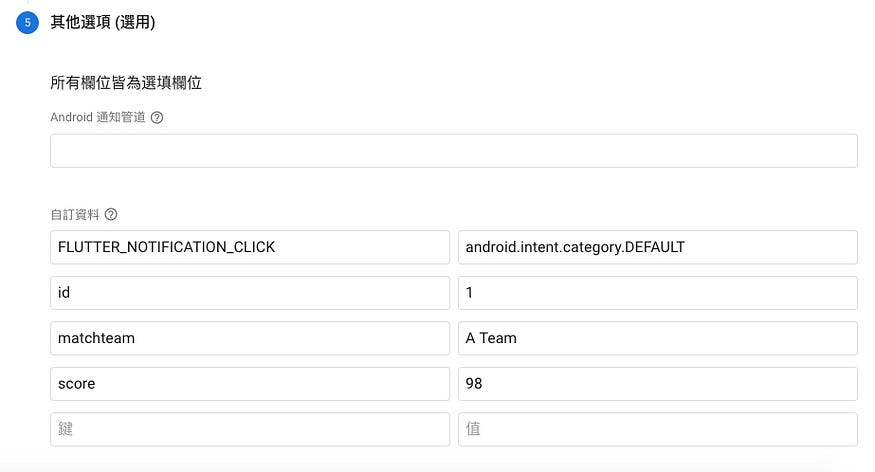
按下發布

這時候您應該就會收到人生第一個使用Flutter and Firebase Messaging的推播訊息了,在上面的某段程式中,總共有三個方法來處理推播訊息
onMessage:指正在使用app然後收到推播訊息的時候(但不會有推播通知)
onLaunch:指在沒有執行app的時候收到推播訊息,然後使用者按下訊息回到app的時候
onResume:指在執行app然後按下推播訊息的時候
若按照上面的方式,無論是執行app中,或者在背景執行,理論上都可以成功的收到推播通知,但在背景執行時收到推播通知,然後點選推播訊息,您會發現無論怎樣都不會去執行onLaunch這個方法,也就是說無法依照訊息的內容來呈現特定的內容給使用者看,這部分我花了兩天才解決…
首先,我建議大家先去找如何使用firebase rest api來發送推播,因為裡面會提到要發送的JSON格式,按照本文範例,應該要發送的JSON如下:
{
 “to”: “目標對象的token,當您run app的時候,在Run訊息裡面可以得知”,
 “notification”: {
   “title”: “這是標題”,
   “body”: “這是內文”,
 },
 “data”: {
   “FLUTTER_NOTIFICATION_CLICK”: “android.intent.category.DEFAULT”,
   “id”: “1”,
   “matchteam”: “team”,
   “score”: “98”
 }
}
我們可以看到訊息裡面有notification和data兩個主要的資料,這個可以對照剛剛使用firebase後台發送的資料,然而光這樣不夠,無法讓使用者點選推播訊息後執行onLaunch這個方法,找了好多資料才知道,必須在notification裡面新增“click_action”: “FLUTTER_NOTIFICATION_CLICK”,如此所有問題都解決了,只是這樣就沒有辦法使用Firebase後台發送訊息,必須自行撰寫程式串接firebase api,但我想這難不倒會看此篇文章的人才對,也可參考下面網址https://medium.com/@d0938687689/%E9%80%8F%E9%81%8Epostman-%E5%82%B3%E9%80%81%E9%80%9A%E7%9F%A5-fcm-bd4ed84f4a70
好拉,以上就是在Flutter裡面使用Firebase Cloud Messaging來發送推播的所有步驟,細節原理就不說明了,請自行做功課吧
參考網頁 :
https://www.djamware.com/post/5e4b26e26cdeb308204b427f/flutter-tutorial-firebase-cloud-messaging-fcm-push-notification
https://stackoverflow.com/questions/56025164/firebase-messaging-onresume-and-onlaunch-not-working
1 則留言
-
王彤
2020/8/1 下午 03:23:05請問在android app關閉的情況下要如何接收到fcm呢?
回覆-
露西的爹 作者回覆
2023/1/4 下午 04:00:31您好,若按照文章中的所有方法,我測試把APP關閉(非背景),還是可以收到通知哦,請您再測試看看
-
露西的爹
Hi,我是露西的老爹,無聊時寫寫文章分享很多有用的資訊。
有新文章就會馬上通知哦!